Schedule
Zoom offers multiple options to schedule a meeting.
Overview
The Zoom Microsoft Outlook Plugin is designed to make scheduling a meeting in Microsoft Outlook quick and convenient. The Plugin allows you to schedule and start instant Zoom meetings, as well as make existing meeting events Zoom meetings. The Outlook Plugin can also sync free/busy times to the Zoom Client based on your Outlook Calendar events (PC only, requires version 3.5 or higher - download the latest version).
Note: Due to new security protocol, the Outlook Plugin is only supported on Mac OS 10.14.1 and above. If you are running an older version, we recommend updating Mac OS, using the Office 365 (Outlook Web) Add-in, or disabling System Integrity Protection (SIP) on the operating system.
This article covers:
Prerequisites
- Windows: Microsoft Outlook 2010 or higher (2007 with limited features)
- Mac: Microsoft Outlook 2011 or higher
- You must have the Zoom client installed and be logged in to your account
- Install the Zoom Microsoft Outlook Plugin from Zoom
- Note that you will need to have administrator privileges on your device.
Download Plugin
You can download the Zoom Microsoft Outlook Plugin MSI file from the Download Center. Once the download is complete, run the MSI file and follow the install wizard to complete the installation. You will need to restart Outlook before using the Plugin.

In order to run the installer to completion, you will need to have administrator privileges on your device. If you are using a DU issued device and do not have administrator privileges, please visit the Support Center for help installing the Plugin.
Instructions
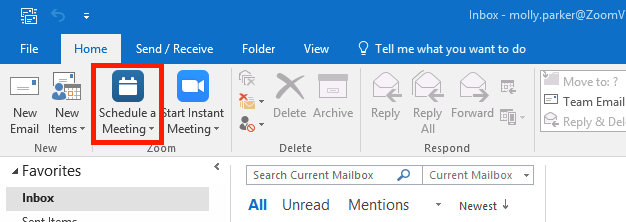
Note: Several versions of Outlook do not support the options to Schedule a Meeting or Start Instant Meeting. If you do not see these in the main ribbon bar, please check to see if they appear after creating a new appointment or calendar event.
Scheduling A Meeting
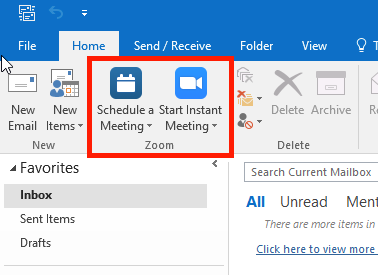
- Select the Schedule a Meeting button.
- Select your desired settings in to the Settings window that appears.

- Video - Host: If you select on, the host's video will be automatically started when starting the meeting. If you choose off, the host's video will be off, but they will be able to turn it on.
- Video - Participant: If you select on, the participant's video will be automatically started when joining the meeting. If you choose off, the participant's video will be off, but they will have the option to turn it on.
- Audio Options: Choose if you want to use Telephony Only, Voip Only, Both Telephony and Voip or 3rd Party Audio.
Zoom Recommendation: if uncertain, leave on Both.
- Require meeting password: If you would like to require a password for your meeting, enter it here.
- Enable join before host: Check if you would like to turn on join before host for your meeting. Read more about Join Before Host.
- Mute participants upon entry: Check if you would like new participants to be muted as they join.
- Use Personal Meeting ID: Check if you would like to use your Personal Meeting ID. If not checked, a randomly generated Meeting ID will be used. Read more about Personal Meeting ID.
- Recording the meeting automatically: check if you would like the meeting to be recorded automatically. Choose if you would like it recorded locally (to your computer) or to the cloud (if available for your account). Read more about automatic recording.
- Force include Join URL in location field: This will include the join URL in the location field even if you attempt to remove it.
- Alternative hosts: Enter the email addresses of any alternative hosts you like to set for your meeting. They need to be other Pro users on the same Zoom account. Read more about alternative hosts.
- Save and do not show again: Check this if you would like to use these same settings as a default for other meetings going forward. The settings window will not pop up and you will need to manually open it to edit the settings.
- Click Continue.
- The calendar invitation will automatically generate with the Zoom meeting information.
Note: You can cancel the Zoom meeting or change the settings of the Zoom meeting in the calendar invitation by selecting the corresponding buttons in the menu.
Scheduling a Personal Audio Conference
- Click on the arrow at the bottom of Schedule a Meeting.
- If you have multiple PAC accounts, choose which you would like to schedule with.
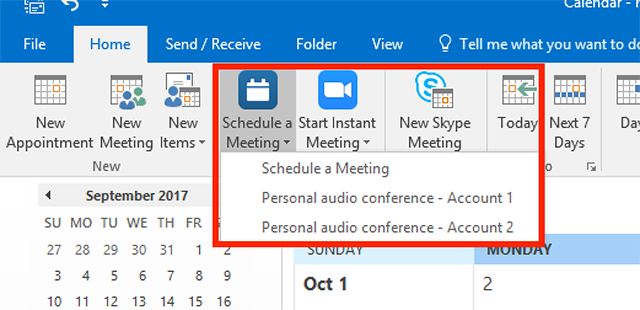
- This will automatically populate an event with your PAC information. Change the date and time and add attendees as needed
- Click Send.
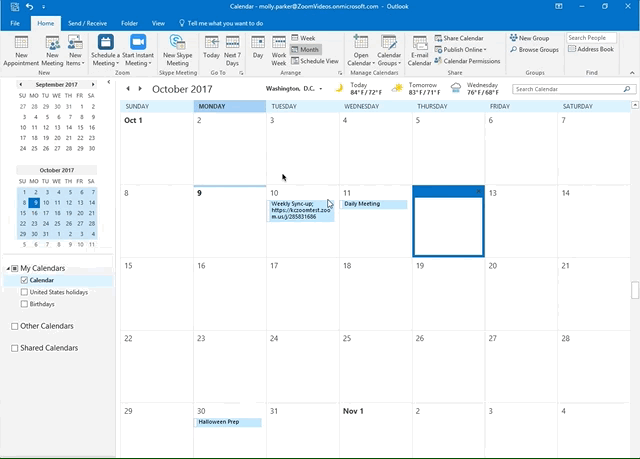
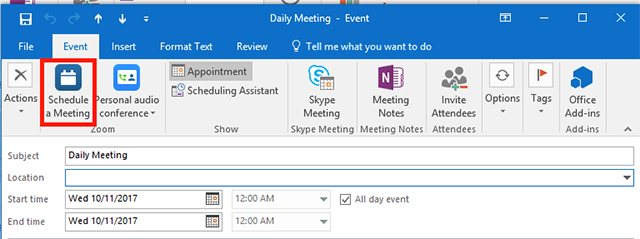
Making an Existing Invitation a Zoom Meeting
- Open your calendar invitation in Outlook.
- Select either Schedule A Meeting or Personal Audio Conference to schedule the meeting type of your choice
- If scheduling a meeting, select your desired settings in the settings window.
- Video - Host: If you select on, the host's video will be automatically started when starting the meeting. If you choose off, the host's video will be off, but they will be able to turn it on.
- Video - Participant: If you select on, the participant's video will be automatically started when joining the meeting. If you choose off, the participant's video will be off, but they will have the option to turn it on.
- Audio Options: Choose if you want to use Telephony Only, Voip Only, Both Telephony and Voip or 3rd Party Audio.
Zoom Recommendation: if uncertain, leave on Both.
- Require meeting password: If you would like to require a password for your meeting, enter it here.
- Enable join before host: Check if you would like to turn on join before host for your meeting. Read more about Join Before Host.
- Mute participants upon entry: Check if you would like new participants to be muted as they join.
- Use Personal Meeting ID: Check if you would like to use your Personal Meeting ID. If not checked, a randomly generated Meeting ID will be used. Read more about Personal Meeting ID.
- Recording the meeting automatically: check if you would like the meeting to be recorded automatically. Choose if you would like it recorded locally (to your computer) or to the cloud (if available for your account). Read more about automatic recording.
- Force include Join URL in location field: This will include the join URL in the location field even if you attempt to remove it.
- Alternative hosts: Enter the email addresses of any alternative hosts you like to set for your meeting. They need to be other Pro users on the same Zoom account. Read more about alternative hosts.
- Save and do not show again: Check this if you would like to use these same settings as a default for other meetings going forward. The settings window will not pop up and you will need to manually open it to edit the settings.
- Click Continue.
- The invitation will now automatically fill in with the details.
- Click Save & Close.

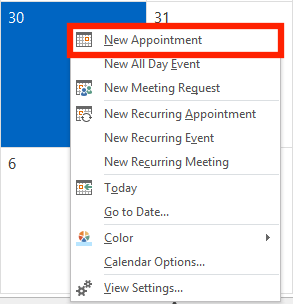
Making a New Calendar Invitation a Zoom Meeting
- Open your Outlook Calendar.
- Right-click the date/time desired and select New Appointment.
- Select either Schedule A Meeting or Personal Audio Conference to schedule the meeting type of your choice.
- If you select Schedule a Meeting, the settings window will appear with additional options. Select your desired settings in the settings window.
- Video - Host: If you select on, the host's video will be automatically started when starting the meeting. If you choose off, the host's video will be off, but they will be able to turn it on.
- Video - Participant: If you select on, the participant's video will be automatically started when joining the meeting. If you choose off, the participant's video will be off, but they will have the option to turn it on.
- Audio Options: Choose if you want to use Telephony Only, Voip Only, Both Telephony and Voip or 3rd Party Audio.
Zoom Recommendation: if uncertain, leave on Both.
- Require meeting password: If you would like to require a password for your meeting, enter it here.
- Enable join before host: Check if you would like to turn on join before host for your meeting. Read more about Join Before Host.
- Mute participants upon entry: Check if you would like new participants to be muted as they join.
- Use Personal Meeting ID: Check if you would like to use your Personal Meeting ID. If not checked, a randomly generated Meeting ID will be used. Read more about Personal Meeting ID.
- Recording the meeting automatically: check if you would like the meeting to be recorded automatically. Choose if you would like it recorded locally (to your computer) or to the cloud (if available for your account). Read more about automatic recording.
- Force include Join URL in location field: This will include the join URL in the location field even if you attempt to remove it.
- Alternative hosts: Enter the email addresses of any alternative hosts you like to set for your meeting. They need to be other Pro users on the same Zoom account. Read more about alternative hosts.
- Save and do not show again: Check this if you would like to use these same settings as a default for other meetings going forward. The settings window will not pop up and you will need to manually open it to edit the settings.
- Click Continue.
- The invitation will now automatically fill in with the details.
- Click Save & Close.
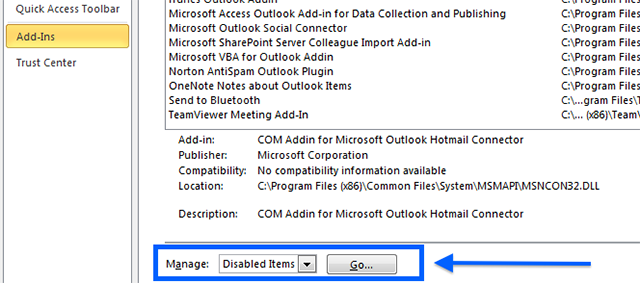
Missing plugin icon
If you do not see the Schedule a meeting icon in the menu ribbon, open your Outlook options.
- Select Disabled Items.
- Choose the Zoom Outlook plug-in
- Select Enable.
- Select the Com Add-ins
- Check the Zoom Outlook plugin box.