Summary
The LanSchool Teacher Console is the interface teachers will use to manage their classroom and students. It contains all the tools necessary for a teacher to effectively interact with students and create a controlled/safe digital environment to promote student engagement. LanSchool is available in Lewis 002, Lewis 004, and Parmer 114.
Body
The LanSchool Teacher Console is the interface teachers will use to manage their classroom and students. It contains all the tools necessary for a teacher to effectively interact with students and create a controlled/safe digital environment to promote student engagement. LanSchool is available in Lewis 002, Lewis 004, Crown 320 and Parmer 114.
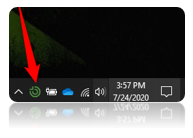
The Teacher Console will be seen running in the system tray. The console can be launched using any of the following methods:
- Left click the system tray icon.
- Right click the system tray icon and choose "Open LanSchool Console..."
- Use the keyboard shortcut CTRL+ALT+L to launch the console.

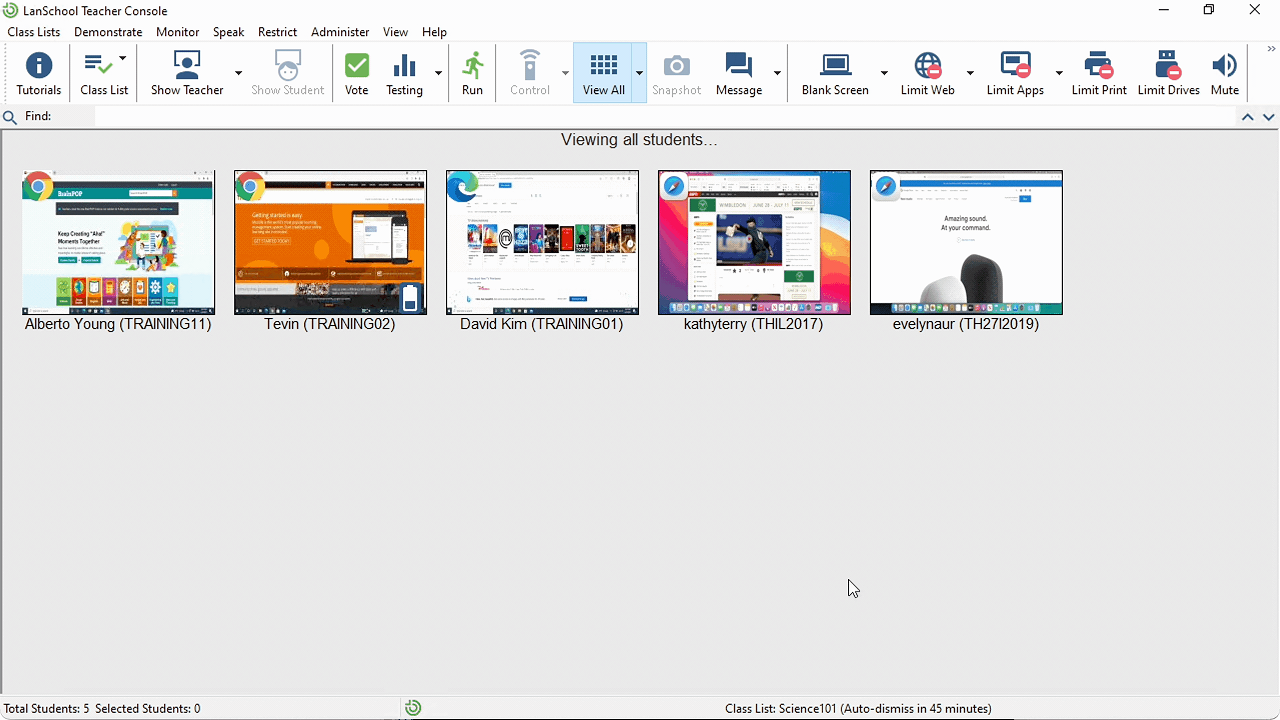
The menu is conveniently broken up into categories which best describe the tools within.

The categories are:
- Demonstrate
- Monitor
- Speak
- Restrict
- Administer
- View
- Help
Teacher Console Quick Reference Card
| Icon |
Description |
 |
Online LanSchool resources for teachers.
Opens a page in your default web browser with various helpful resources and tutorials for LanSchool Classic.
|
 |
Ask students to vote.
Allows a teacher to create a question that students can vote on and view the results real time.
|
 |
Show teacher’s screen to the students.
Full screen, windowed, and drawing modes are additional features.
|
 |
Show the selected student’s screen to all students.
|
 |
Asks students to take a test.
Teachers can create self-grading tests with the following type of questions: True/False, Multiple Choice, and Short Answer. Essay questions are also possible, but they will not self-grade.
|
 |
Push a website or launch an application.
Teachers can enter a URL or application name and LanSchool will run it on the selected students machines.
|
 |
Remote control student.
Teachers can take control of the mouse and keyboard of a selected student’s machine.
|
 |
Toggle between different viewing options
Allows you to select between viewing all student screens as thumbnails or a more detailed list view of devices in class.
|
 |
Take a screenshot of students screens and save them to the teacher's device. |
 |
Send students a text-based chat message.
Teachers can send a message to one student, a group of selected students, or the entire class.
|
 |
Open a one-way communication channel between teachers and students that uses the device's microphone.
Teachers can speak to the class, let a student speak to the class, talk with a student, or listen to a student.
|
 |
Blank students screen.
Forces student machines into a blank screen state which can be accompanied by text or even a defined graphic.
|
 |
Restrict internet access.
Web limiting can be configured for blocking or allowing defined sites on student machines.
|
 |
Restrict applications.
Allows a teacher to restrict which apps can be ran on a student machine.
|
 |
Restrict student printing. |
 |
Limit drives.
Allows a teacher to limit which drives a student can interact with.
|
 |
Mute student speakers.
|
 |
Stop all applications currently running on a student machine. |
 |
Transfer and play a local video file on the selected students.
Show Video is not supported in environments with the LanSchool Connection Service installed.
|
 |
Manage or load class lists.
|
 |
Handout or collect files from students. |
 |
Shut down, power on, restart or log off student machines.
|
 |
Browse the internet with selected students. |
 |
Choose a random student. |
 |
Refresh student list. |
 |
Save class list.
|
 |
Change LanSchool configuration preferences. |
Quick Start Guide
| Feature |
How to Use it in Teacher Console |
 |
- Select one or more student computers from the Teacher Console*
- Click the “Vote” button from the toolbar
- Type the question and supply the answers
- Select either True/False or Multiple Choice to determine the options available
- Click the “Send” button to push the question to student computers
|
 |
- Select one or more student computer thumbnails*
- Click the drop-down arrow to the right of the “Show” button
- Select the Full Screen or Windowed option
|
 |
- Select a single student computer thumbnail
- Click the “Show Student” button in the toolbar
|
 |
Create a Test
- Open the Test Builder by clicking the “Testing” button and selecting “Create Test”
- Click “New Test” to add the first question
- Type in the question and select True/False, Multiple Choice, Short Answer, or Essay “Add a Question” configuration window LanSchool Test Builder with one multiple choice question added
- For True/False or Multiple Choice questions, configure the answer options and select the correct answer
- For Short Answer questions, type correct short answer responses separated by a comma
- Click “Save” to add the question to the test
- Continue adding questions to a single test by clicking the “Add Question” button
- Click the “Save Test” button to save the entire test and all of the questions. Choose a location on your computer to save the file.
Note: When configuring a question, you can browse and select an image to be embedded within the question. This could a mathematical graph, equation, diagram, or other visual representations of the question.
Administer the Test
- To push a test out to students, click the “Testing” button and select “Ask Students to Take a Test”
- Select students from the Included/Excluded lists and use the Add/Remove buttons to choose who the test will be sent to
- Click the “Load” button to browse and select a previously created LanSchool test file
- Select the “Options” button to configure the test to be timed, full screen, or randomized. Click “OK”
- Click “Start” to load the test on the student computers and begin the test
Monitor the Test Results
View the results in real-time within the “Send Test to Students” window. When the test is complete, click the “Stop” button. Click “Export” to save all responses in a spreadsheet format on the teacher computer
|
 |
- Select one or more student computers*
- Click the “Run” button on the toolbar
- Enter the Run command you would like to send to student computers
|
 |
- Select a student computer thumbnail
- Click the “Control” button on the toolbar
|
 |
- Select a student computer
- Click the “Snapshot” button from the toolbar
- Choose a location on your computer to save the image file
|
 |
- Select one or more student computers*
- Click the “Message” button from the toolbar
- Type a message and click “Send” to display that message to students
- Selecting the “Force Student to Read this Message” checkbox will make the message pop-up above all other windows
|
 |
- Select student computer thumbnails*
- Click the “Blank Screen” button in the toolbar. Student screens will be blanked and a message will be displayed. Student keyboards and mice will also be locked.
Note: To stop blanking screens, click “Blank Screen” button again to toggle this feature off
|
 |
Step 1. Configure Limit Web
- Select the drop-down arrow to the right of the “Limit Web” button in the toolbar • Select the “Configure Web Limiting” option
- Select either “Block All”, “Allowed Web Sites” or “Blocked Web Sites” and add website addresses to those lists
Step 2. Then Limit Web on Student Computers
- Select one or more student computer thumbnails*
- Click the “Limit Web” icon in the toolbar (use the drop-down arrow to select either “Block All”, “Allow List”, or “Block List”)
|
 |
Step 1. Configure Limit Applications
- Select the drop-down arrow to the right of the “Limit Apps” button in the toolbar
- Select the “Configure Application Limiting” option
- Add application .exe’s to either the “Allowed Applications” list or the “Blocked Applications” list
Step 2. Apply Limit Applications on Student Computers
- Select one or more student computer thumbnails*
- Click the “Limit Apps” icon in the toolbar (use the drop-down arrow to select either “Allow List” or the “Block List”)
|
 |
How to Send Files to Student Computers
- Select one or more student computers from the Teacher Console
- Select the drop-down arrow to the right of the “Files” button in the toolbar
- Select the “Send Files” option
- Select a source folder on the teacher computer that contains the files you’d like to send
- Select a destination folder on the student computer for the files to be copied into
- Create a custom folder to specify the location directly
- OR use a special folder such as the individual student’s Desktop or My Documents location
- Click the “Send Now” button
How to Collect Files from Student Computers
- Select one or more student computers from the Teacher Console
- Select the drop-down arrow to the right of the “Files” button in the toolbar
- Select the “Collect Files” option
- Select a source folder on the student computer that contains the files you wish to collect
- Specify the file name or file type you wish to collect
- Using an asterisk (*) will collect all files
- Using an asterisk (*) followed by a file extension will collect all files of that type (e.g. *.doc)
- Select a destination folder on the teacher computer
- Click the “Collect” button
|